Web Bluetooth API を使ってブラウザだけでMicro:bitとBLE通信してみる。

概要
「Reveal.jsをMicro:bit(chibi:bit)でコントロールする。」の記事では、micro:bit(chibi:bit)をフロントエンドと繋げるのに、バックエンドとしてnode.js(BLE & web socket)を使っていましたが、今回は、Web Bluetooth APIを使ってブラウザだけでmicro:bitと通信してみました。
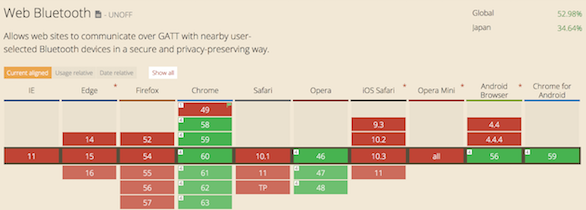
※ いまのところWeb Bluetooth APIを利用できるのは、デスクトップのChrome/Operaと一部最新のAndroidのみです。
事前準備
- ペアリングのセキュリティを解除し、すべてのBLEサービスを有効にするために以下の作業を行う必要がある。参考:Flashing micro:bit firmware
- hexファイルをダウンロードする。
- USBケーブルを使用してマイクロビットをPCに接続。
- hexファイルをmicro:bitディスクドライブにコピーする。
- micro:bitを再起動する。
- LEDにドットが表示されるので、傾けて円を描く(キャリブレーション)
- サービス/キャラクタリスティックのUUIDを調べておく。
ここで確認できます。
参考にした記事
BLEについて今更調べてみた – Qiita
ブラウザからBluetoothが使える! JSでWeb Bluetooth APIを使ってBLE機器を操作する方法[Lチカ・温湿度センサー編] – ICS MEDIA
接続フロー
基本的には、デバイス → GATTサーバー → サービス -> キャラクタリスティックと辿っていくことで、利用したい機能に接続します。
- デバイスのスキャン(navigator.bluetooth.requestDevice)
- ペアリング
- GATTサーバーに接続(device.gatt.connect)
- サービスの取得(server.getPrimaryService)
- キャラクタリスティックの取得(service.getCharacteristic)
- キャラクタリスティックにvalueを書き込む(characteristic.writeValue)
上記の流れをコードにするとこうなります。
|
1 2 3 4 5 6 7 8 9 10 11 12 13 14 15 16 17 18 19 20 |
navigator.bluetooth.requestDevice(options) //デバイスのスキャンを開始 .then(device => { console.log("デバイスを取得しました", device); return device.gatt.connect(); }) .then(server =>{ console.log("GATTサーバーに接続しました", server); return server.getPrimaryService(LED_SERVICE_UUID); }) .then(service => { console.log("サービスを取得しました", service); return service.getCharacteristic(LED_TEXT_CHARACTERISTIC_UUID); }) .then(chara => { console.log("キャラクタリスティックを取得しました", chara); chara.writeValue(value); //値を書き込む }) .catch(error => { console.log(error); }); |
LED、テキスト表示サンプル
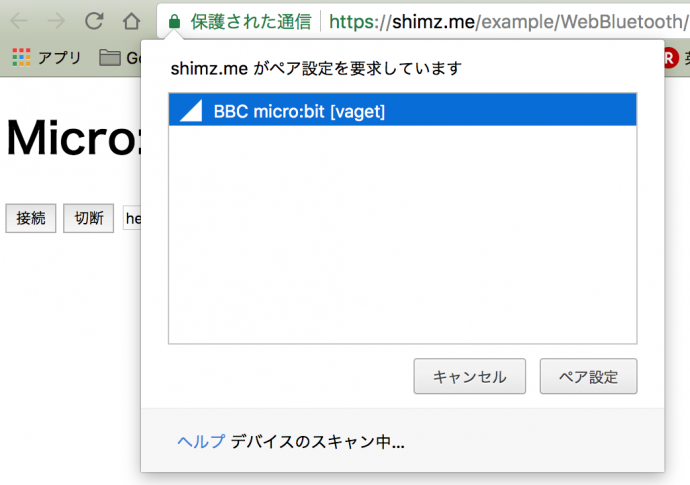
ブラウザ上からMicro:bitにテキストデータを送信し、LEDに表示するサンプルです。
Web Bluetooth APIで接続。#microbit #chibibit pic.twitter.com/T11xDeiidG
— 清水正行 (@_shimizu) August 8, 2017
|
1 2 3 4 5 6 7 8 9 10 11 12 13 14 15 16 17 18 19 20 21 22 23 24 25 26 27 28 29 30 31 32 33 34 35 36 37 38 39 40 41 42 43 44 45 46 47 48 49 50 51 52 53 54 55 56 57 58 59 60 61 62 63 64 65 66 67 68 69 70 71 72 73 74 75 76 77 78 79 80 81 82 83 84 85 86 |
<!DOCTYPE html> <html> <head> <meta charset="utf-8" /> <meta http-equiv="X-UA-Compatible" content="IE=edge"/> <title></title> </head> <body> <button id="connect">接続</button> <button id="disconnect">切断</button> <input id="message" value="hello" /> <button id="send">送信</button> <script src="//cdnjs.cloudflare.com/ajax/libs/d3/4.3.0/d3.min.js"></script> <script> var bluetoothDevice; var characteristic; //chibi:bit BLE UUID var LED_SERVICE_UUID = 'e95dd91d-251d-470a-a062-fa1922dfa9a8'; var LED_TEXT_CHARACTERISTIC_UUID = 'e95d93ee-251d-470a-a062-fa1922dfa9a8'; //ボタンイベントリスナー d3.select("#connect").on("click", connect); d3.select("#disconnect").on("click", disconnect); d3.select("#send").on("click", sendMessage); //chibi:bitに接続する function connect() { let options = {}; //options.acceptAllDevices = true; options.filters = [ {services: [LED_SERVICE_UUID]}, // <- 重要 {name: "BBC micro:bit [vaget]"} ]; navigator.bluetooth.requestDevice(options) .then(device => { bluetoothDevice = device; console.log("device", device); return device.gatt.connect(); }) .then(server =>{ console.log("server", server) return server.getPrimaryService(LED_SERVICE_UUID); }) .then(service => { console.log("service", service) return service.getCharacteristic(LED_TEXT_CHARACTERISTIC_UUID) }) .then(chara => { console.log("characteristic", chara) alert("BLE接続が完了しました。"); characteristic = chara; }) .catch(error => { console.log(error); }); } //LEDに表示するメッセージを送信 function sendMessage() { if (!bluetoothDevice || !bluetoothDevice.gatt.connected || !characteristic) return ; var text = document.querySelector("#message").value; var arrayBuffe = new TextEncoder().encode(text); characteristic.writeValue(arrayBuffe); } //BEL切断処理 function disconnect() { if (!bluetoothDevice || !bluetoothDevice.gatt.connected) return ; bluetoothDevice.gatt.disconnect(); alert("BLE接続を切断しました。") } </script> </body> </html> |
ポイント
BLE(Bluetooth Low Energy)についてあまり詳しくなくても、結構すんなりとつながりました。
ただ、いくつかハマりどころがあったので掲載しておきます。
- 当然ですがSSL必須
- サービスを利用するには、requestDeviceのオプションでフィルタリングしておく必要がある。フィルタリングしていないとセキュリティエラーがでる。
- writeValueメソッドでテキストを書き込む際、String型をArrayBuffer or ArrayBufferViewに変換する必要がある。
